Thursday, December 25, 2008

Tutorial Exercise 6

The Steps Of Progression Exercise 6

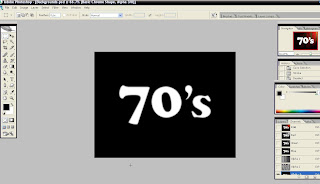
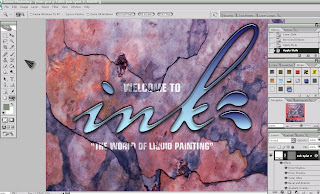
Step 1 : create new layer and click filter -------> render ---> cloud


Step 2 : click filter ---> render ---> lighting effect and choose the texture channel


Step 3 : select the words ..press down the Ctrl and create new layer


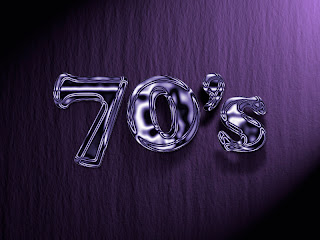
Step 5 : after using the drop shadow, lasso tool and gaussian blur


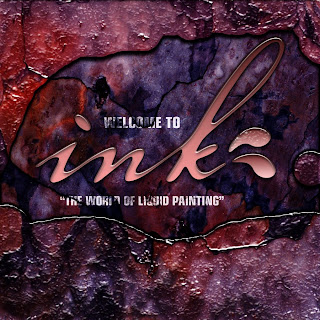
This is the final work of the tutorial 6

Thursday, December 18, 2008

Tutorial Exercise 5

This is the image of tutorial 5 that i need to do it


The Step Of Progression Exercise 5

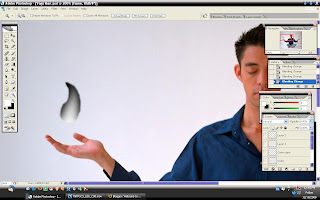
Step 1 : using lasso to draw the fire after that click ctrl backspace become white color , then using brush to paint it


Step 2 : create the fire as many as i needed , then using liquify to create some changing to make it look like a flame ...


Step 3 : Copy the flame to the right hand then edit---transform to Flip horizontal


Step 4 : In the same way , create the fire then using Gaussian blur


Step 5 : after that using the filter --------> liquify with the flames


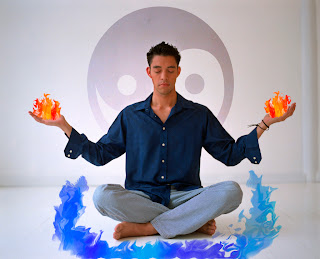
This is the Final work of the exercise 5


Wednesday, December 10, 2008

Progression Of Assignment 2

The Steps Of Progression Assignment 2

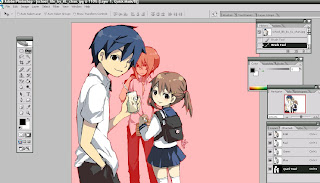
Step 1 : I using quick mask mode and cut the picture


Step 2 : It's the same way also ..i also edit with the quick mask mode to cut the image out


Step 3 : Layer cut from the background using the masking mode put in the background


Step 4 : Using the custom shape tool to draw the tiger finger print and then drop the shadow , use the low opacity and change pattern overlay .


Step 5 : Use text to type the words after that using the layer style to drop the shadow , outer glow , bevel and emboss , gradient overlay and stroke .


Step 6 : " FOM OPEN DAY " use filter -----> texture --> Patchwork .


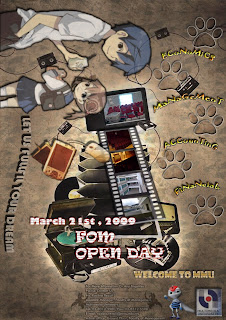
This is the final work of the assignment 2 wallpaper

Project Charter Assignment 2

Assignment 2 Title :

Digital Wallpaper for the theme “MMU FOM open day


Project Start Date:
8 December,2008


Project Finish Date:
23 December, 2008.


Project Manager:

Lim Kai Hwa


Email:

mcg1014.1081104902@gmail.com


Website:
http://mcg1014-1081104902.blogspot.com/


Project Objective :

I need to create a digital image as a wallpaper .The theme would be MMU FOM Open Day dated March 21st ,2009 . As such , I also need to create a poster to show the characteristics or features of FOM to advertise or to promote our faculty .

Approach :
I’m using Adobe Photoshop CS 2 software to create the digital image and the size of the wallpaper will be A4 . I will using some images which I search on the web site . Besides , there are many tools that I need to use it such as brush tool , history brush tool , zoom tool , lasso tool , gradient tool and layer masking where I learned from the tutorial exercise and tips and techniques via courseonline2u web site . I will show the process of the digital wallpaper in the blog from the beginning stage until the end of the final output stage .


This is the background that i need to use for wallpaper


These are some of the references

Roles and Responsibilities :

Time Frame
10/12/08 – I search some pictures through net and download
it which can suitable for the MMU FOM open day or i also will take some pictures that which are related to the FOM faculty .

12/12/08 – learn some tips and techniques through courseonline2u .

14/12/08 – Using the Adobe Photoshop CS 2 to design the digital wallpaper .

20/12/08 – Final work have done it .


Comment:
The layer masking i still learning with it and i hope i can use it as well .


Tuesday, December 9, 2008

Tutorial Exercise 4

This is the exercise 4 picture that I need to do it . It's seems like very complicated ...hehe >.<


The Steps Of Progression Exercise 4

Step 1 : Using the gradient overlay and choose the blue color


Step 2 : Tick the drop shadow and inner shadow then change the distance and size


Step 3 : After that tick the outer glow and change the black color


Step 4 : Bevel and Emboss---> contour
This effect is quite cool ..u can see the different between with it


Step 5 : This is the effect after done with bevel and emboss----> contour


Step 6 : Go to the channel ..create "green" copy of it...after that click Ctrl L and set the input level and also Gaussian blur


Step 7 : Add layer mask then using brush tool to paint it


Step 8 : Click layer style and choose blending options---tick blend interior effects as group and then click the opacity around 17 something.......


Step 9 :Then i try to change the color overlay ....make it different


This is the final work of exercise 4


Thursday, December 4, 2008

Tutorial Exercise 3

I choosing this picture that i need to do in exercise 3


The Steps Of Progression Exercise 3

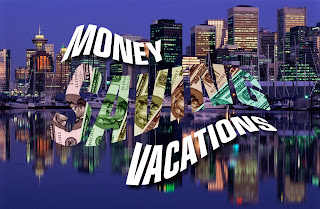
Step 1 : Choosing the money picture then drag it and drop the image


Step 2 : After that go to channel , click the RGB color.....


Step 3 : Put shadow Then copy the money as many as u can to cover the "Saving" words , after that click ctrl alpha and then new layer will come out ...click alt backspace then the "Saving" words will become black color .


Step 4 : After that click alt combine with the layer which is " Saving "


Step 5 : Finish with the combining then i adjusting the color to make it more colourful and nice .
Click image ---adjustment ---color balance


Final work that i have done it


Tuesday, November 25, 2008

Project Charter Assignment 1

Assignment 1 Title :

Printout Postcard for the theme “Malaysia, Truly Asia”


Project Start Date:
23 November,2008


Project Finish Date:
28 November, 2008.


Project Manager:
Lim Kai Hwa


Email:
mcg1014.1081104902@gmail.com


Website:
http://mcg1014-1081104902.blogspot.com/


Project Objective :
We need to create a multi-cultural event for a post card. The theme would be "Malaysia, Truly Asia" which is the official slogan for Malaysia Tourism. We need to show the multi-cultural aspects of Malaysia culture or life as a positive feature to attract tourist into this country.


Approach :
I’m using Adobe Photoshop CS 2 software to create the postcard
and the size of the postcard is 6x8 inches with 300 resolution. I

will using the image which I search on the web site petronas
KLCC . Besides , there are many tools that I need to use it such as
brush tool , history brush tool , zoom tool , lasso tool , gradient

tool and so on where I learned from the tutorial exercise in the
video . Actually I will try to use my own creativity to design the
postcard and use some image which has Multi-cultural pictures . I

will show the process of the postcard in the blog from the
beginning stage until the end of the final output stage .


Roles and Responsibilities :

Time Frame
23/11/08 – I will try to search the picture on the net and download
it which can suitable for the multi-cultural postcard .

24/11/08 – Find some reference , I try to use some technique which
has teach in the reference such as Adobe Photoshop
CS2 books .

25/11/08 – Using the Adobe Photoshop CS 2 to design the postcard

26/11/08 – Final work have done it and I will print it out .

These pictures is found from flickr web site . It's look very nice so i decided to choose this picture as a postcard background .
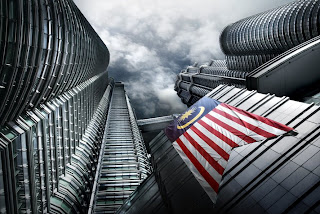


Here are the references which i found from the goggle web site and flickr web site . Some ideas where i found it just my observation in my ordinary life like rainbow so i planned to use rainbow for this postcard .


Comment:

  1. Adobe Photoshop software is very cool . I think that mostly people will like to use to design the pictures and make some effects of it. I have used this software just for few months although it’s quite hard . But I will try my best to do it as well . actually I think the mostly difficult things I have met is text problems and filter things .